This is a tutorial on how to build your own Spinbrush Hybrid Motor.
What you will need for this mod:
STEP #1
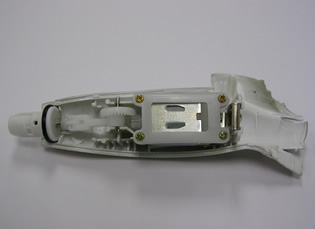
Take your Crest Spinbrush (motors are the same for the classic and the pro packs so get the cheaper classis Spinbrush) and rip it open. The outer casing is glued together, so you will have to break the Spinbrush. We used a basic pair of pliers to help pry it apart.
STEP #2
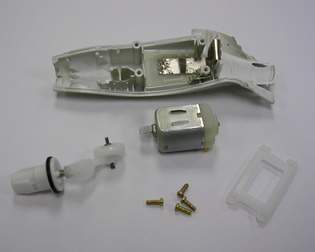
Next you will need to remove 4 screws to disconnect the motor. (Keep the screws as they are a little larger than your Xmod screws and are a quick fix when you strip the threads on your car.)
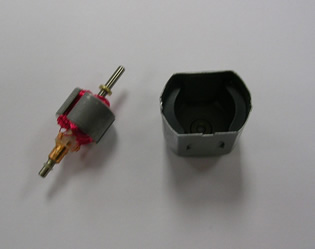
STEP #3

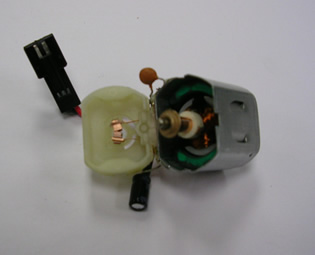
The next task is to get the stronger magnets out of the Spinbrush motor. Start by separating the motor can and removing the pinion. (We used a small flathead screwdriver to pry the pinion off and the small metal tabs holding the can together.)
STEP #4
Next remove the armature from the can.
STEP #5
This next step is important if you want your motor to run properly and in the right direction. Use a colored marker to mark the top of the magnets, you will need to put them in the Stage 2 motor can in exactly the same position.
STEP #6
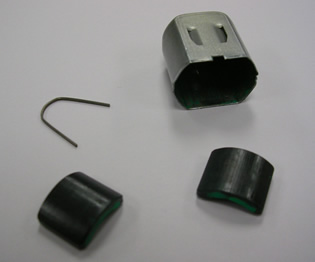
Once youve marked your new magnets, you can remove the small clip holding them in the can and then remove the magnets. (Use your Flathead Screwdriver.)
STEP #7
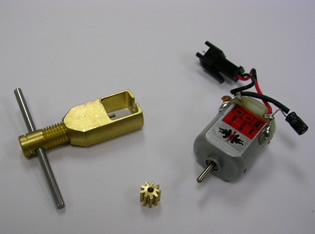
Next you need to prepare your Stage 2 motor. Start by removing the pinion. Be careful not to break the teeth, you will need this pinion for your final motor. (We used a pinion puller, this is a tool sold on atomicmods.com to remove small pinions.)
STEP #8
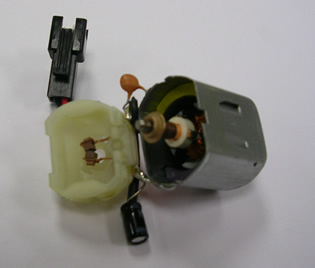
Next step is to separate the can. This is a little more difficult as the can and bell are connected by some caps. (Make sure you do not lose the small washer found in the Stage 2 motor.)
STEP #9
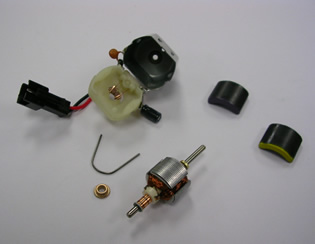
Now you can remove the armature and magnets as you did in the Spinbrush motor. (Make sure to keep the two motors parts separate.)
STEP #10
Place your new Spinbrush magnets into the Stage 2 can and then put the armature back in its place. (Make sure you use the original Stage 2 armature as is has a much better winding then the Spinbrush. Also remember to put the small washer back in place at the end of the armature.)
STEP #11
Slip your can back together carefully and push the small metal tab s back down to lock it in place.
STEP #12
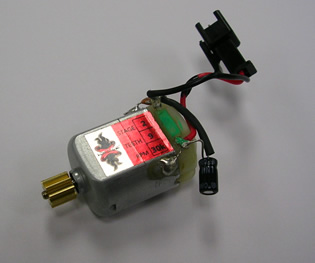
Replace your Stage 2 pinion or other pinion of choice. (We used a small hammer to gently tap the motor into the pinion. You can use a pair of pliers that is opened slightly to allow the armature to push past the edge of the pinion.)
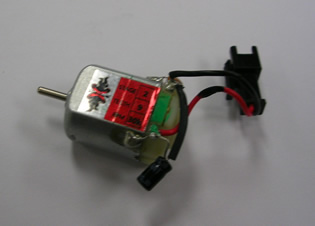
Now you are done. You have a Spinbrush Hybrid Motor!!! Our tests on several cars showed an average of 7kph increase in top end speed (according to our Tamiya Dyno) and a noticeable increase in torque. This works well for both the Gen 1 and Evo Xmods.
|
